Garage and shop thread

A place for fun discussion of common interests we have besides Fieros

Moderator: ericjon262

The Dark Side of Will
Peer Mediator
Posts: 15708
Joined: Wed Nov 24, 2004 11:13 pm
Location: In the darkness, where fear and knowing are one
Contact:

Garage and shop thread

Post by The Dark Side of Will »

Unsafe got us started with this thread: phpBB/viewtopic.php?f=6&t=18101
about his new house and garage.

I figured I'd follow up.

Last weekend (12/11-12/13) my dad and I and a friend installed a rolling door on my garage. The garage is a detached 22x30 (interior) building with a 9x16 car door and separate man door. It has its own electric meter and panel, but currently is only wired for 110V power. I'll be wiring up for 220 as my garage build progresses.

Pics of the door installation:

Image

Image

Image

Image

Image

Image

Image

For the heavy lifting

Image

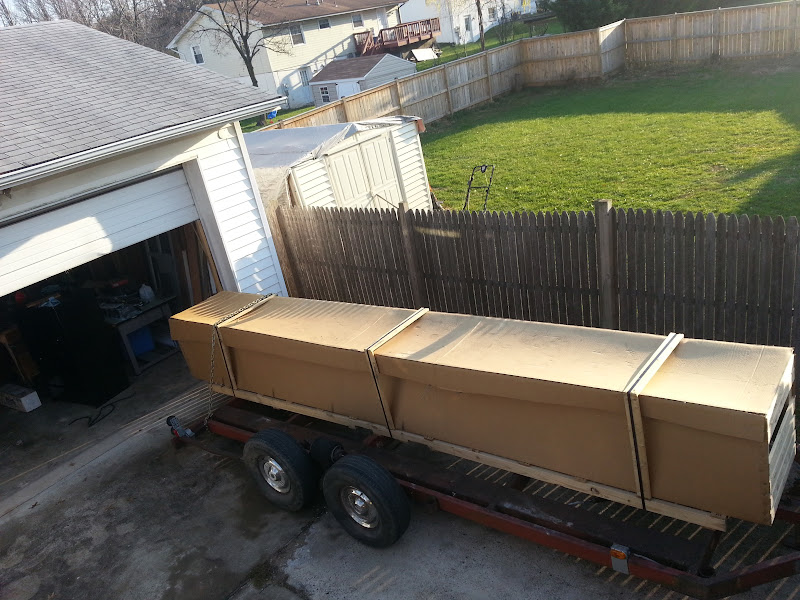
Door in a box

Image

Tine extensions to reach far enough into the garage to do the job

Image

Why no, I'm not compensating for anything...

Image

Image

Image

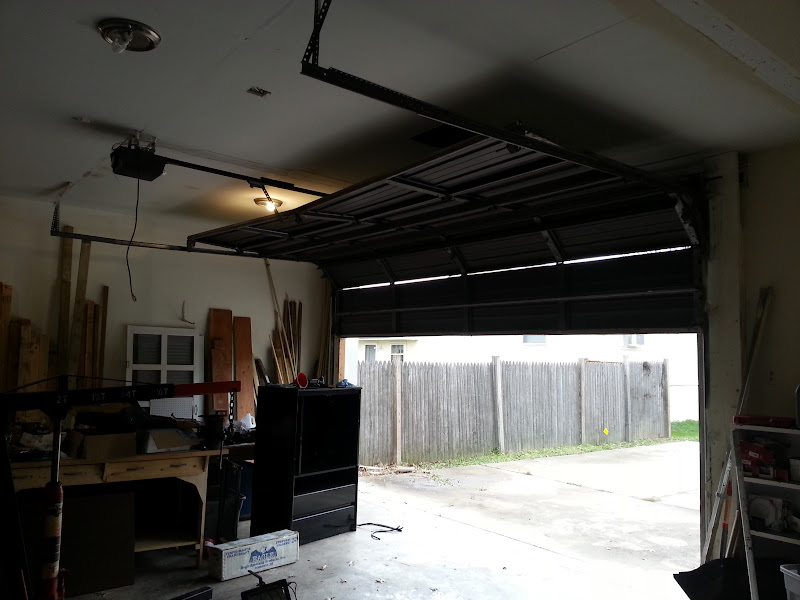
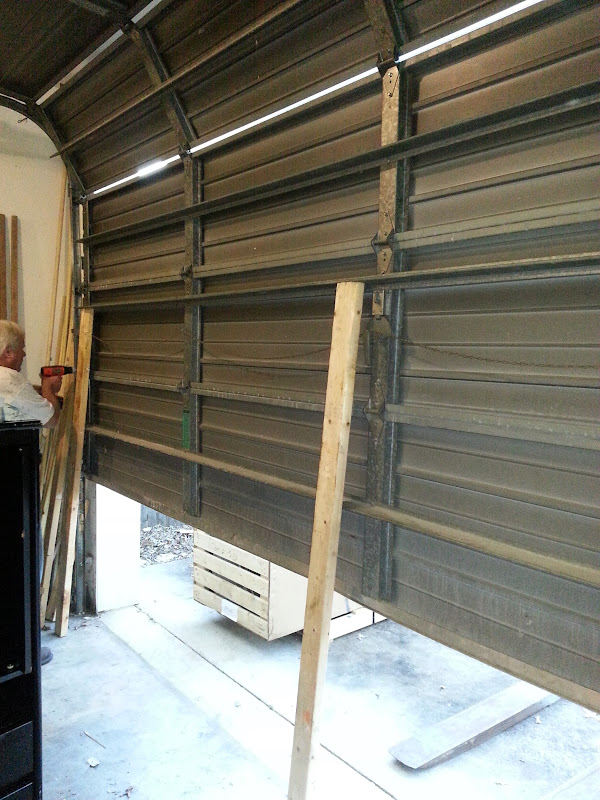
First: get the old door out. Here we used the forklift to take the weight so we could unhook the springs.

Image

Next, propping up the next higher panel so we could unbolt the one below
Image

Aaaaannnnd it's out

Image

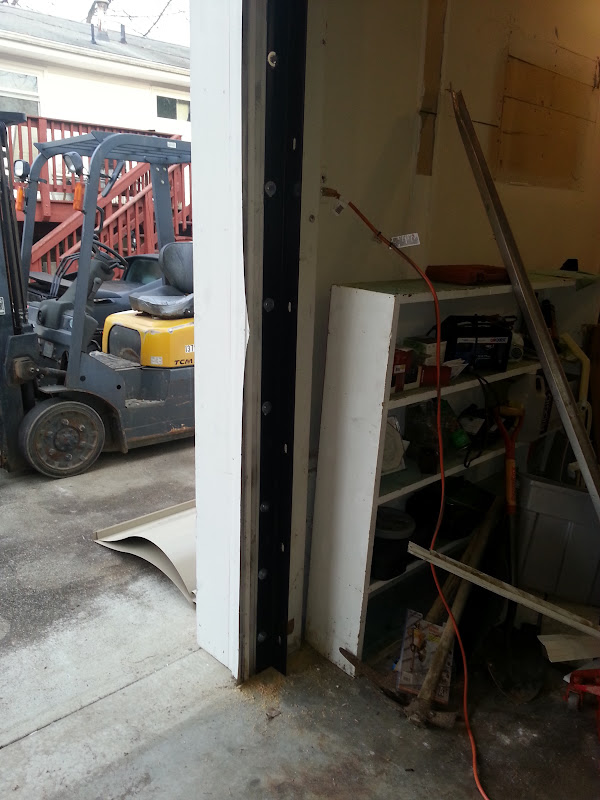
It's tough to get good shots of the tracks installed. This is actually where we spent most of the *time* required... figuring out what in the building we could anchor to securely, drilling clearance and pilot holes for 3/8 x 7" lag screws and turning them in.
Image

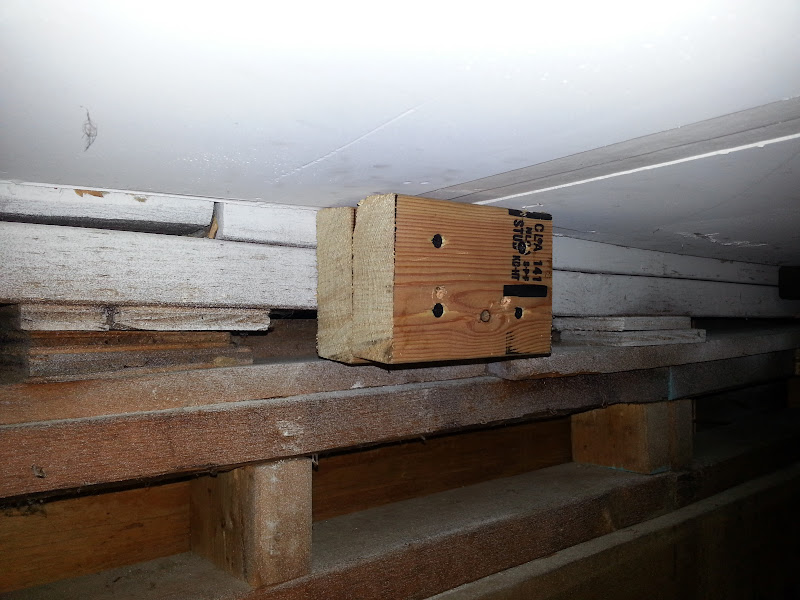
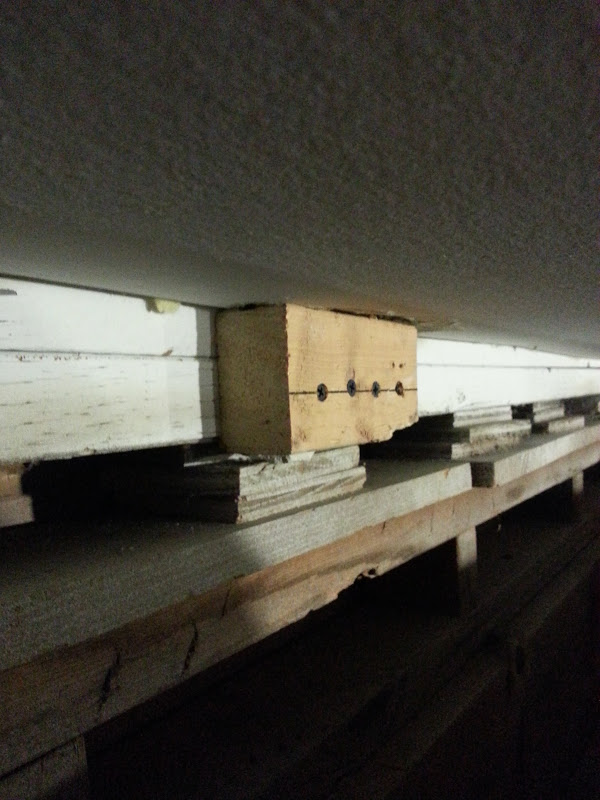
The installer or builder had set up a stack of 2x10's on each jamb, but it wasn't clear how well they were anchored to the actual load bearing members of the building. Here we had to cut and install some blocks at the top of one in order to be able to put lags through into the top plate of the wall, which of course is anchored to the roof trusses (we hope).

Image

Image

Image

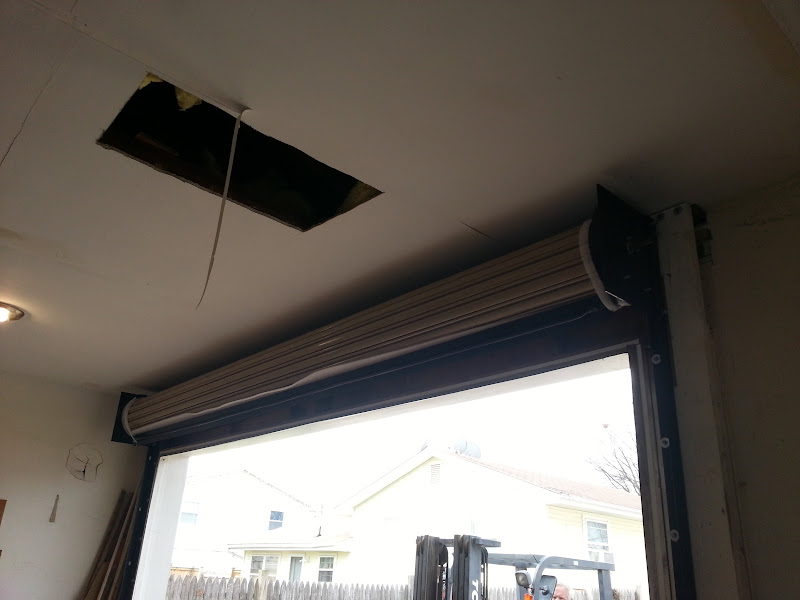
Per the spec sheet included with the unit, the curtain assembly, here shown elevated for installation, weighs 519 lbs. It's secured to the tracks by three 1/2" bolts per side.

Image

Bolted up... didn't even fall on anyone's head
Image

Skip a couple of steps...

Here it is installed, with the manual operator assembled

Image

AAAAAAANNNNNNNDDDDDD... the finished product:

Image

They'll even let me advertise to myself for FREE!

Image

Wouldn't be finished without extra parts (Wait... what?)

Image


The reason I went to all that trouble and threw down about twice the cash that a sectional garage door would cost is to free up ceiling space for the installation of a FUCKING BRIDGE CRANE, BITCHES. :-D

More to follow on that. I was expecting to have to build the rails from 4" I-beams and beam trolleys, anchored to the roof trusses through the ceiling, with the bridge being a 4" beam with a T-section welded to the top so it could hold 1,000# in the middle of a 20 foot span. This should be a very compact arrangement and let me get my hook height as high as possible under the 10'8" ceiling.

However, the place from which my dad is semi-retired assembles Ingersol Rand trolleys and rails and the owner offered some to my dad for FREE!.
I probably won't be able to keep the hook quite as high with these materials, but the price is right. Even without the free stuff, the crane was going to be MUCH cheaper to build than the door was to buy.
User avatar
Shaun41178(2)
Posts: 8581
Joined: Fri Nov 19, 2004 7:12 pm
Location: Ben Phelps is an alleged scammer

Re: Garage and shop thread

Post by Shaun41178(2) »

Looks good. Thought of doing the same ay my place but for a 2 post instead of a crane.
FieroPhrek working on that ls4 swap for 18 years and counting now. 18 years!!!!! LOL


BEWARE OF BEN PHELPS. YOU HAVE BEEN WARNED. WORSE THAN MILZY IMO
User avatar
crzyone
JDM Power FTW
Posts: 4654
Joined: Wed Nov 17, 2004 12:40 am
Location: Whitecourt, Alberta, Canada

Re: Garage and shop thread

Post by crzyone »

That is sweet! If I do a 2 or 4 post lift I might have to do the same.
The Dark Side of Will
Peer Mediator
Posts: 15708
Joined: Wed Nov 24, 2004 11:13 pm
Location: In the darkness, where fear and knowing are one
Contact:

Re: Garage and shop thread

Post by The Dark Side of Will »

Sales lead at Overhead Door said the extra parts were to use to padlock the door shut if so desired.
fieroguru
Posts: 258
Joined: Sun Jan 15, 2006 1:30 pm

Re: Garage and shop thread

Post by fieroguru »

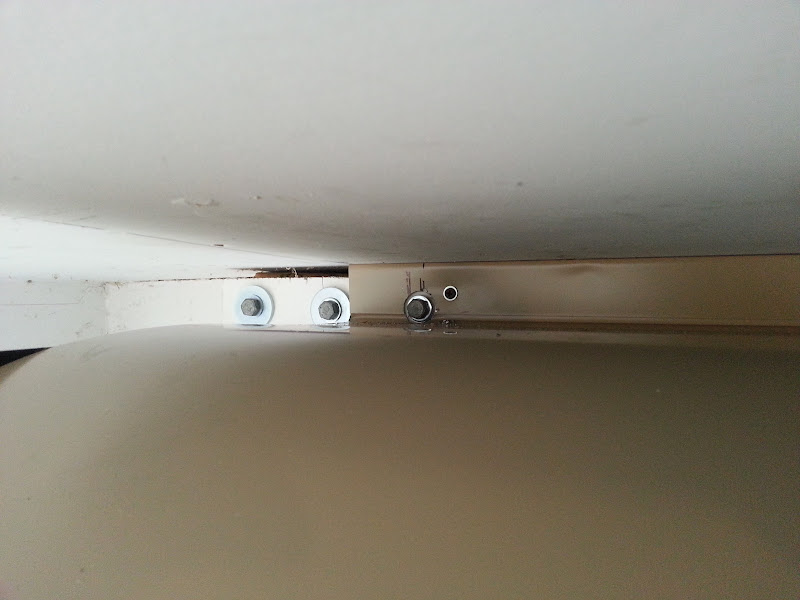
Did raising the rails to put the door less than 1" from the ceiling not get you enough room? Something like this (second pic):
Image

I am almost done with all the "house work" on our new place and will start setting up the new 3 car garage. One of the things I am looking at is raising the garage door rails to maximize head room.
The Dark Side of Will
Peer Mediator
Posts: 15708
Joined: Wed Nov 24, 2004 11:13 pm
Location: In the darkness, where fear and knowing are one
Contact:

Re: Garage and shop thread

Post by The Dark Side of Will »

I just wanted a roll up door, ok? :wink:

I assume those are pics of your old place?

I would have had to hang the rails for the bridge crane under the door, which would have kept me from anchoring them to every roof truss.

The rails can be kept pretty close to the ceiling, but the bridge has to hang below them rather than between them unless I want to sacrifice a foot of trolley travel at each end of the bridge in order to fit the bridge between the rails. I also have to keep the bridge ~5" off the ceiling to clear light fixtures, but it'll have to have a certain section height to have a working load of 1000 lbs right in the middle.

Once I hang a chain hoist from the bridge trolley, I wouldn't be a bit surprised if my hook height is just barely over 8'6" under a 10'8" ceiling. That's not that low, but I wouldn't want it much lower.
fieroguru
Posts: 258
Joined: Sun Jan 15, 2006 1:30 pm

Re: Garage and shop thread

Post by fieroguru »

Those pics are random internet ones. I had raised rails 15 years ago in my commercial building in IL so I am familiar with them.
User avatar
Emc209i
Posts: 1470
Joined: Thu Jan 18, 2007 2:31 am
Location: Charleston, SC

Re: Garage and shop thread

Post by Emc209i »

Looks great Will! 519 pounds, wow! Looks like its very rewarding to open. Is the final piece with the "advertising" on it a top seal? I can see sunlight coming over the top of the roll when the door is closed. If its not a seal, do you have any plans to airtight the top of the assembly using brush material or something? Looks like it has a nice rubber foot at the bottom.

My pops and I built solid hardwood garage doors for his home. Each bay door wasn't as wide, but I don't remember them weighing anywhere close to 500lbs. That's a lot of steel to support the alloy slats.
The Dark Side of Will
Peer Mediator
Posts: 15708
Joined: Wed Nov 24, 2004 11:13 pm
Location: In the darkness, where fear and knowing are one
Contact:

Re: Garage and shop thread

Post by The Dark Side of Will »

Good eye for the sunlight over the top of the door.

The advertising is a beauty cover. There is a kit which mounts a brush seal at the top of the outer surface. I've RFQ'd that but haven't heard back yet.
The whole door is steel. It's definitely a commercial/industrial quality unit.
The Dark Side of Will
Peer Mediator
Posts: 15708
Joined: Wed Nov 24, 2004 11:13 pm
Location: In the darkness, where fear and knowing are one
Contact:

Re: Garage and shop thread

Post by The Dark Side of Will »

Got around to ordering the brush seal for the door to take care of the outside light problem.

Still have to mount the shroud, but have been slow on the crane thanks to taking forever to get pricing on the Ingersol-Rand parts to hang the rails. $34 each and I'd been 56 of them... no thanks. I'll adapt beam clamps instead.

Of course over the weekend I realized that I can adapt beam clamps that are pretty good but I can *MAKE* beam clamps that are EXACTLY what I need. :-D
Pretty simply too... It'll be more expensive than modifying shelf parts, but BRAGGING RIGHTS!

Also, building a minor small air system and taking notes for "male unions" (no, not from Old Europe).

http://www.kiowa.co.uk/51-P00009943/3/4 ... n-Union-MF
http://www.indiamart.com/ganeshsteelemp ... tting.html
http://www.beyondpiping.com/products_de ... d=207.html
http://www.threadedpipe.co.uk/3-4-bsp-m ... qual-union
https://www.plumbingsupply.com/blackfittings.html#075
http://www.pipefittingsdirect.co.uk/con ... uk/d8.html
http://www.intricoproducts.com/product/ ... iece-union
https://flowflex.sharepoint.com/Pages/M ... eIron.aspx
http://www.osspvalve.com/project/150-lb ... ale-union/
http://www.rvsfittingen.eu/en/hexagon-u ... l-m-f.html
http://www.nero.co.uk/Catalogue/150LB-B ... n-MaleMale
http://www.hoseflex.com/product/bspp-x- ... rel-union/


Too bad all the stainless ones are from Chinese manufacturers... Even though it's had an IPO and is a "reputable" company, I still don't trust Ali Baba.

And the ones I find are mostly BSP rather than NPT.
The Dark Side of Will
Peer Mediator
Posts: 15708
Joined: Wed Nov 24, 2004 11:13 pm
Location: In the darkness, where fear and knowing are one
Contact:

Re: Garage and shop thread

Post by The Dark Side of Will »

Building a new plumbing tree for my uncle's old air compressor. Even though it's a 1 HP unit, I have 3/8" quick disconnects and 3/8" hose, so I can empty the tank QUICK!

McMaster had a 3/4 to 3/8 hex reducing nipple and a 3/8" brass union, so I didn't have to find a male NPT union. Overall, the stack went together pretty well. I need to RTV the mating surfaces of the union, as it's the only leak in the system, but that's not a huge deal.

Image


Had to build up some blocks in order to install the 2x4 headers for the garage door shroud:

Image

Image

Image

One header up:

Image

Both headers up:

Image

The shroud support bracket:

Image

Pre shroud installation:

Image

Mid shroud installation:

Image

I still need to drill a few holes, add a few screws and bolt the bottom edge of the shroud to the end of the center bracket and the rails that are welded to the end plates of the door assembly.
The Dark Side of Will
Peer Mediator
Posts: 15708
Joined: Wed Nov 24, 2004 11:13 pm
Location: In the darkness, where fear and knowing are one
Contact:

Re: Garage and shop thread

Post by The Dark Side of Will »

Going to tile my basement with 3/4" thick 1018 steel tiles!

Image

Or not... those are the blanks for these:

Image

Which are the beam clamps for use with the forthcoming bridge crane rails

Image

I also *finally* got the roll up door shroud fully secured. I ended up having to take out all the screws I had installed except for the ones at the very ends of the flange, then bolting in the lower ends, then going back to reinstall the screws on the top.

When the shroud is allowed to hang and find its own curve, the flange sags. If you screw it to the wall sagged, then the shroud buckles when you try to draw it in to the diameter of the rails on the door end brackets. If you leave the screws in the middle of the flange out and only attach it with screws in the ends, then when you pull it down to the final diameter, the extra stiffness pulls the sag out of the flange. You can then screw the flange to the wall.

I wish that the instructions had covered that... or at least, you know, existed.

End product:

Image

In other news, I thought I had overkilled the shit out of getting a long drill bit to drill screw holes. I was wrong... it was only just barely long enough:

Image

Because we'd had to put long lag screws through the mounting face for the door and into the underlying structure of the building, I had to use a holesaw to make clearance for the heads of those lags under the mounting flange for the shroud:

Image

Overall it was a giant pain in the ass, so I was really stoked to finally get it completely installed.
User avatar
Emc209i
Posts: 1470
Joined: Thu Jan 18, 2007 2:31 am
Location: Charleston, SC

Re: Garage and shop thread

Post by Emc209i »

Bridge crane.
User avatar
Emc209i
Posts: 1470
Joined: Thu Jan 18, 2007 2:31 am
Location: Charleston, SC

Re: Garage and shop thread

Post by Emc209i »

Bridge crane.

No really. I want to see this thing.
The Dark Side of Will
Peer Mediator
Posts: 15708
Joined: Wed Nov 24, 2004 11:13 pm
Location: In the darkness, where fear and knowing are one
Contact:

Re: Garage and shop thread

Post by The Dark Side of Will »

Emc209i wrote:Bridge crane.

No really. I want to see this thing.
Me too!

The hard to find materials:

Image

Image

Image

Ingersoll-Rand ZRS3 material handling rail. It comes in 20' sticks, and I have 3 whole sticks + 1 cut in half. The building is 30 x 22. The 30' dimension will be the rails and will be covered by a stick + a half, while the 22' dimension will be the bridge and will be covered by a single 20' stick. The front and rear ~1' of the building will not be accessible by the crane. Oh Darn. Each stick weighs close to 200 lbs.

The place from which my dad's semi-retired used to be a supplier for IR. IR lent them a roll former. My dad's employer would roll form the rail halves from something like 3/16" x 9" steel, then spot weld them together, then drill the end fixture holes, then weld on the end attachment fittings, then run the welded assembly through the powder coating line. A few years back IR awarded the contract elsewhere, took their roll former back and haven't been heard from since. My dad's employer had a fair stock left,but had nothing to do with it since they could no longer sell it as IR product. It was essentially scrap to them. My dad and I secured the few pieces you see here. It really wasn't that hard to make, but IR charges an arm and a leg for it. The retail prices for the stuff are insane, but we got it for free. There wasn't enough of the ancillary components around to do a full IR installation in my garage. That's fine with me. The IR hardware has multiple DOF's and is made to be pulled on by neanderthals three shifts a day, 7 days a week. The important problem it had for me was that the IR ancillary hardware would cost me a lot of hook height. Under a 10' 9" ceiling, I'd be lucky to get a hook height as high as 8' using the IR hardware. I designed the beam clamps previously shown, truss tie bars not yet shown and bridge end fixture hardware yet to be shown to maximize my hook height. I should be able to keep the hook height close to 9' with my designs.

The beam clamps I showed previously will clamp onto the back of this rail and interface with truss tie bars that attach to both the upper and lower chords of the building's roof trusses. With the relative stiffness of the rail and the trusses, the load should spread very well and I'll have 200 lbs or less on each truss, even with the full 1000# rated load at one end of the crane.

Also, will be rebuilding the south wall with R22 worth of rigid foam insulation and plywood instead of drywall. Once that's set up, I'll build a pretty big modular shelf installation to hold all my crap.

Image
The Dark Side of Will
Peer Mediator
Posts: 15708
Joined: Wed Nov 24, 2004 11:13 pm
Location: In the darkness, where fear and knowing are one
Contact:

Re: Garage and shop thread

Post by The Dark Side of Will »

I've been working on installing the bridge crane.

The first step was to cut slots in the ceiling where all the hangers are going to be:
Image

and

Image

Those are along the back wall. The front wall looks similar. In the second pic you can *just* see the wire I'm using as an alignment reference. I'll discuss more later.

The next step was to use some .060 plastic shims and my 6 foot level to measure the relative elevations of the lower chords of all the trusses. Most of the trusses fall within the 1" range of installation elevation I allowed in the design of the tie bars, but three each at the front and the back will require me to have new tie bars with longer "necks" cut because those trusses are up to 1 1/2" higher than the lowest of the others... the building wasn't built terribly straight. That's why it's important for me to be particularly retentive about aligning everything... it just won't go together otherwise.

Here's the adjustable mount for the wire. The vertical leg goes down to a 25# weight. The wire is .031" galvanized steel. The setup is a screw hook screwed into the lower chord of the very end truss that sits on top of the south wall with a turbuckle for adjustment and then that shackle to get the adjustment range where it needs to be.

Image

This is a tie bar in a test location. This particular truss is one of the highest, but the tie bar is showed adjusted all the way up. I was simply using that location as a reference for setting the elevation of the wire to coincide with that at the other end.

Image

I don't need to use C-clamps to hold the tie bars in place... these cheap ass spring clamps from Harbor Freight will do just fine.

Image


The building had varmints living in the attic for a bit... they entered through a hole in the soffit. I put a stop to that shit, but there are still signs (like droppings in the insulation, chew marks, etc.).

Here's another indicator:
Image

Notice how the insulation is blackened around the bare wires.
User avatar
Emc209i
Posts: 1470
Joined: Thu Jan 18, 2007 2:31 am
Location: Charleston, SC

Re: Garage and shop thread

Post by Emc209i »

What temperature would you like your mouse served, sir?
The Dark Side of Will
Peer Mediator
Posts: 15708
Joined: Wed Nov 24, 2004 11:13 pm
Location: In the darkness, where fear and knowing are one
Contact:

Re: Garage and shop thread

Post by The Dark Side of Will »

Been installing the tie plates from which to hang the rails. This particular one has been modified to install adjacent to the flue for the wood stove currently in the building. That thing's going to leave as I need the floor space. I'll hang a heat pump from the ceiling or something.

Image

5 of 15 trusses at the rear were outside the 1" of height adjustment I built into the tie plates, so I had to have a second run of plates with longer "necks" made to install at those locations. The situation was similar at the front, but for only 3 of 15 trusses. The second run has been cut and I will get them cleaned and painted this weekend. With both wires set up and all the parts produced, I just need to put in the hours setting up and screwing in the tie plates. I'll also need to reinstall the drywall patches I cut out to keep attic air out of the shop volume. That will pretty much have to happen before we install the rails, but should only be a couple of hours of work.

Brought up my dad's friend's builder's level today. It's a Dewalt sight level using a three point adjustable base with a swiveling telescope that has a level vial attached. So as you set it up, you swing the telescope over each adjustment screw and adjust the vial level. This should fairly quickly level the base and then you get to work.
However, it didn't. I checked by swinging the scope 180 and the vial didn't read the same as it did the other way... Sigh. My definition of level is apparently better than that of the guy who calibrated the instrument... who probably worked in the Dewalt factory on the day the gizmo was built.

I compensated for the calibration error and was able to dial it in quickly after I knew about the problem.

The rear wire was 1/8" out of level over 30 feet... not bad for using a 6' level and some plastic shims to measure the relative elevation of crooked-ass trusses.
My dad and I had been debating the level state of the front wire. I thought the south end was 1/4" low based on the data from the trusses, but to arrive at that conclusion, I had to throw out three measurements (out of 15) that weren't matching up. He was using these measurements to come to the conclusion that it was fine as it was.
The sight level said I was right :wink:

We adjusted the wire at the front of the building level, but did find that it's 11/16" higher than the wire at the rear of the building. That's not a huge deal, as I can compensate for that in the end fixture plates that will attach the bridge to the rail trolleys.

The "rails" are usually called the "runway"... but since mine's not built into the building structure, I have a hard time calling it a runway.
The Dark Side of Will
Peer Mediator
Posts: 15708
Joined: Wed Nov 24, 2004 11:13 pm
Location: In the darkness, where fear and knowing are one
Contact:

Re: Garage and shop thread

Post by The Dark Side of Will »

Been working hard on the crane this week.

*ALL* of the tie plates are installed... 12 screws each times two per truss (per rail) times two rails times 15 trusses is 720 screws. It's actually more like 710 as a couple didn't grab, a couple had to be trimmed and lost a screw hole as shown above, etc.

One of the obnoxious things I had to do was borrow an oscillating plunging cutter to cut out some weird 24" squares of plywood. The builder drilled holes through them and ran cables through the holes, then screwed the squares to the trusses... very weird way to run wires. Those are out of the way now. I may have to go rewire most of the shop anyway.

Here are the FIVE different parts I had to have made because my garage is built so crooked:

Image

Here are the tie plates installed for the front and rear rails:

Image

Image

In the process of reassembling the drywall to keep the hot attic air out of the shop:

Image

Laying out the materials for the rail installation THIS F@#$ING WEEKEND!

Image

I found the engineering data for the rails on Ingersoll-Rand's website. They say the ZRS3 is 10.06#/ft... so the 20 ft pieces are a bit over 200#... not fun to move those on my own.
The Dark Side of Will
Peer Mediator
Posts: 15708
Joined: Wed Nov 24, 2004 11:13 pm
Location: In the darkness, where fear and knowing are one
Contact:

Re: Garage and shop thread

Post by The Dark Side of Will »

Emc209i wrote:What temperature would you like your mouse served, sir?
I found a lot of droppings, a few chewed wires and several places where the backside paper had been scraped off the drywall and some of the gypsum gouged away... but oddly enough no furry little corpses or carcases... yet.
Post Reply