LS4 V8 DoD 4T65-E TAPShift swap underway (pics inside)

Real tech discussion on design, fabrication, testing, development of custom or adapted parts for Pontiac Fieros. Not questions about the power a CAI will give.

Moderators: The Dark Side of Will, Series8217

Post Reply
Sinister Fiero
Posts: 665
Joined: Tue Jun 07, 2005 12:10 pm
Location: Waterloo, Indiana
Contact:

LS4 V8 DoD 4T65-E TAPShift swap underway (pics inside)

Post by Sinister Fiero »

Image

Image

Image

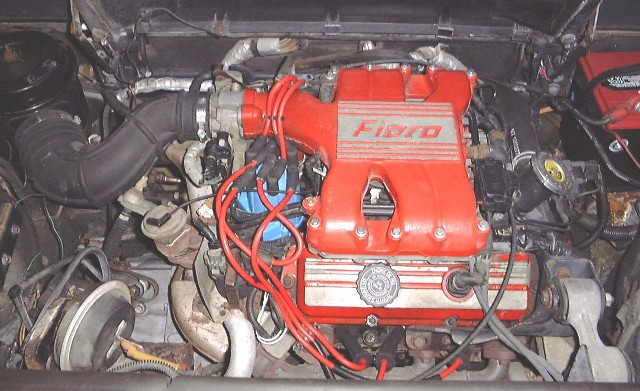
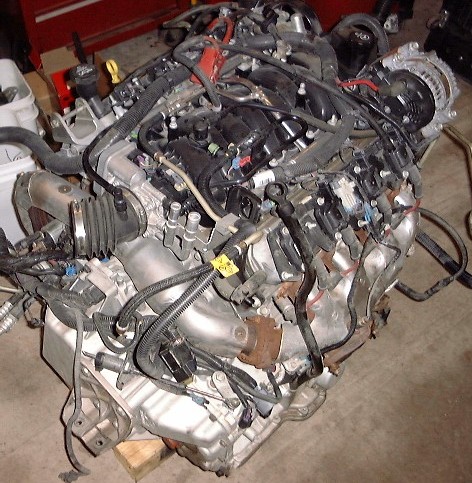
Donor motor, transmission, and related parts came out of a 2005 Grand Prix GXP courtesy of Ed Morad Parts Co. http://www.moradpartscompany.com

All of this will be going into a 1987 Fiero GT. The features that are planned to be included in the swap are:

-The transmission TAPShift function (steering wheel mounted shift paddles)
-DoD (displacement on demand) function in the engine
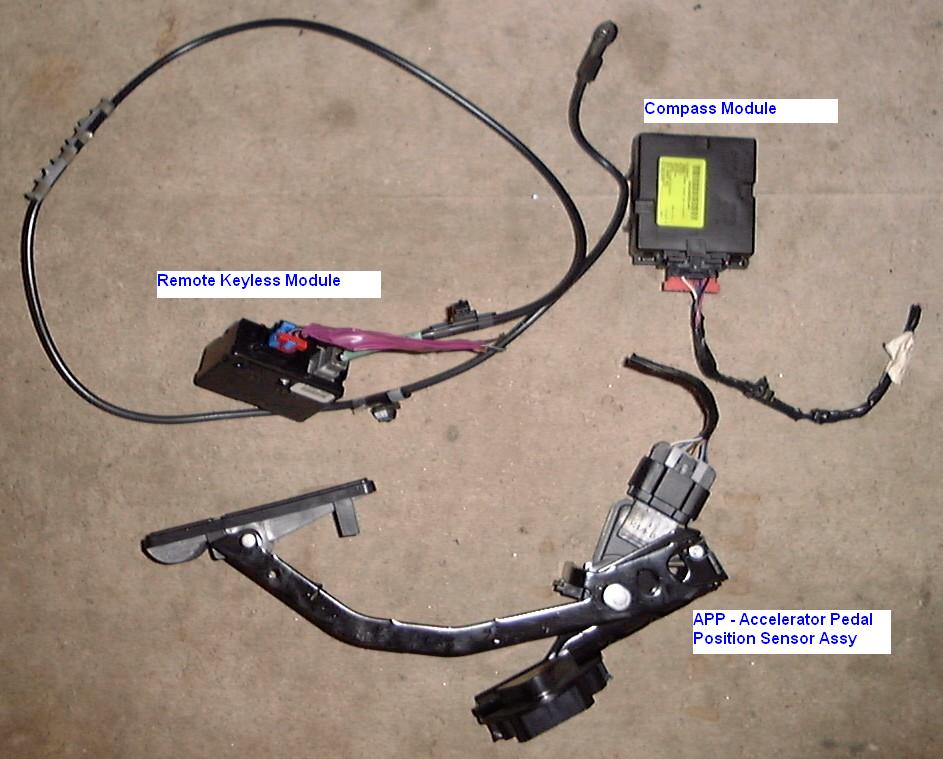
-And factory remote start / keyless entry / driver info center.

THE PLAN:

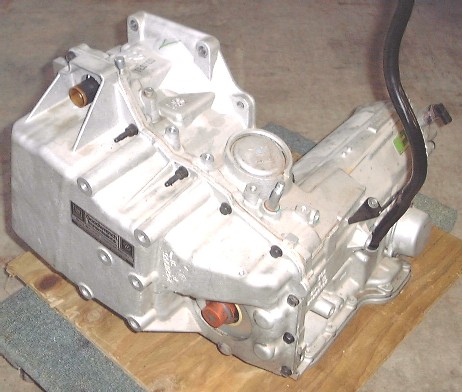
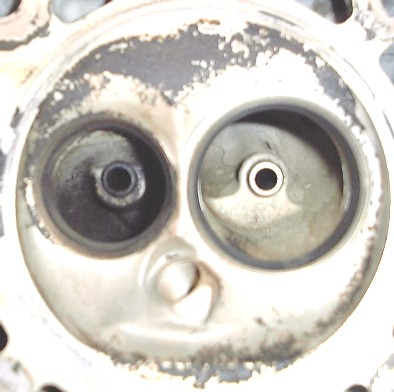
Phase 1 has been completed which was to port the cylinder heads in order to increase power output of the engine without sacrificing drivability or fuel economy. An aftermarket cam was considered as on option but no suitable affordable unit was available. Also the transmission has been gone thru (by TripleEdgePerformance: http://www.tripleedgeperformance.com ) in order to install a shift improver kit and various fixes for known bugs.

Phase 2 is the mechanical and electrical aspects of the engine/transmission swap. The plan is to complete this phase and get the engine running before I move on to Phase 3.

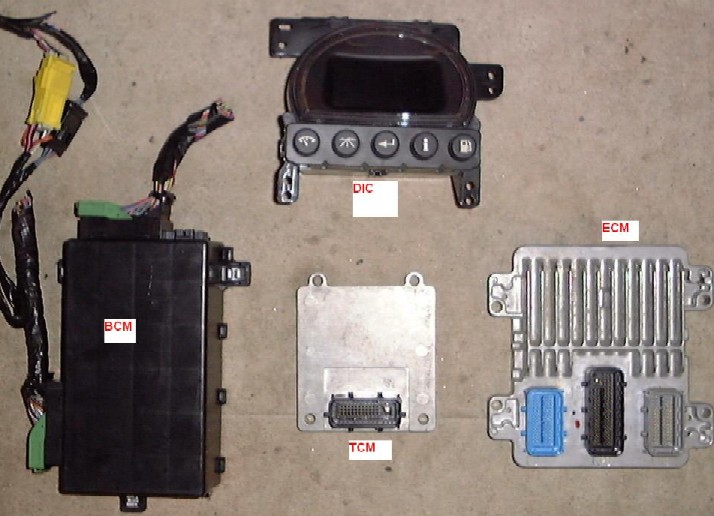
Phase 3 is to install the BCM, DIC, and other modules we got from the Grand Prix in to the Fiero to see how much of it I can get working without too much trouble. There is currently no programming software available that can reprogram the BCM to remove certain functions so I imagine I will have a lot of work to do in order to "fool" certain inputs and outputs in order to prevent warning messages from being displayed on the DIC.

Image

Image

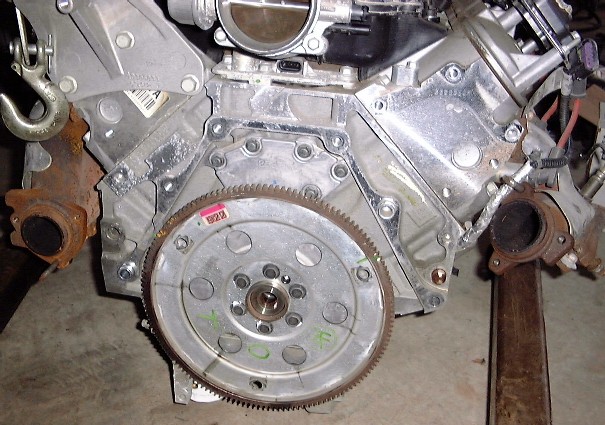
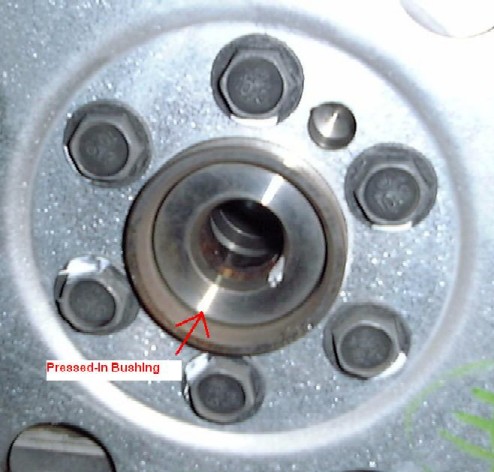
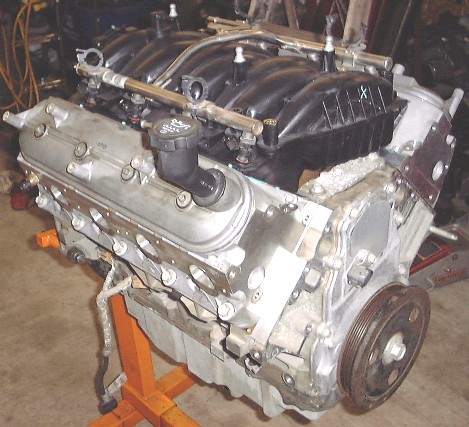
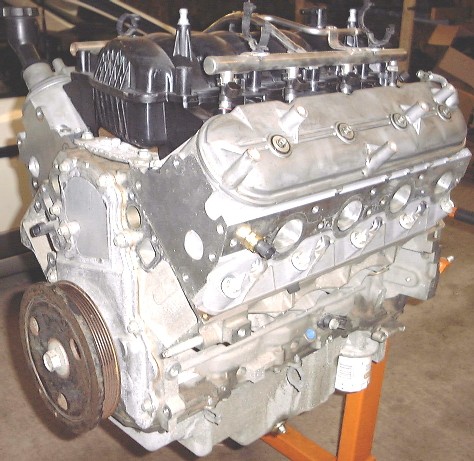
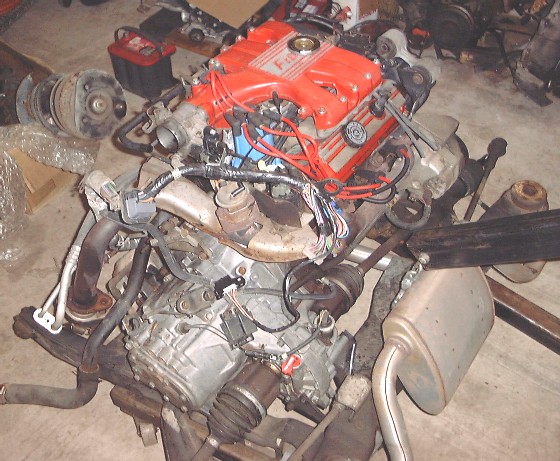
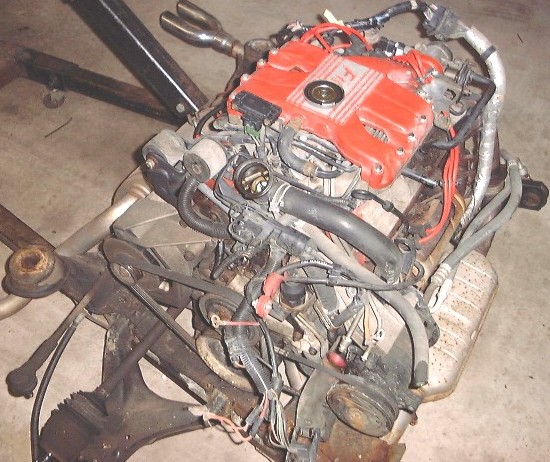
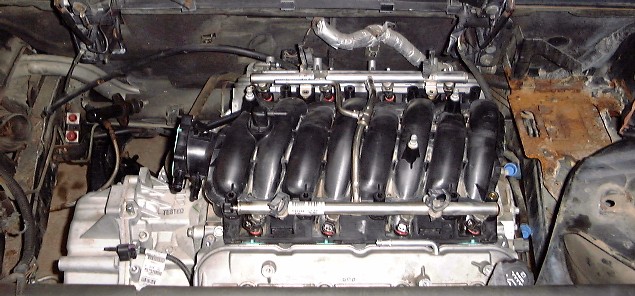
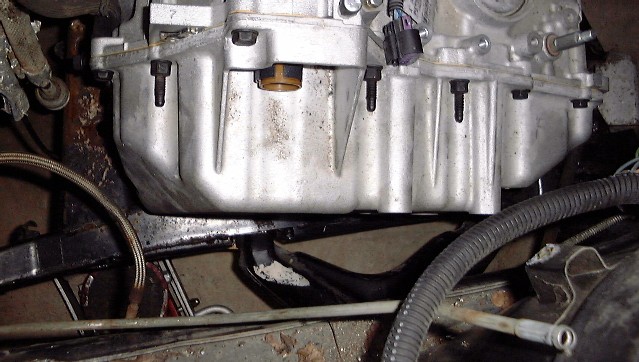
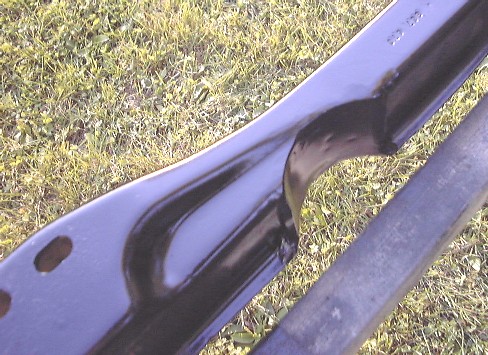
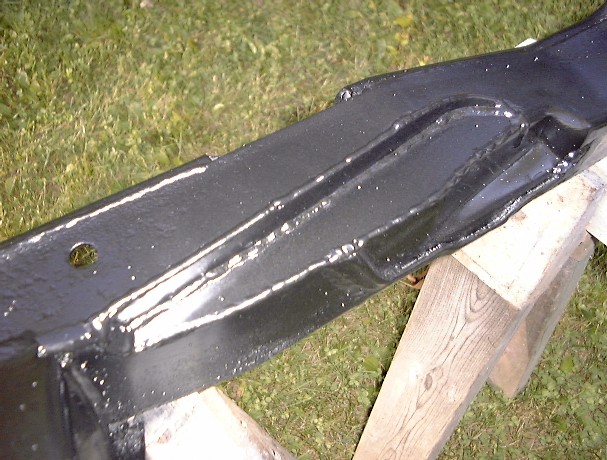
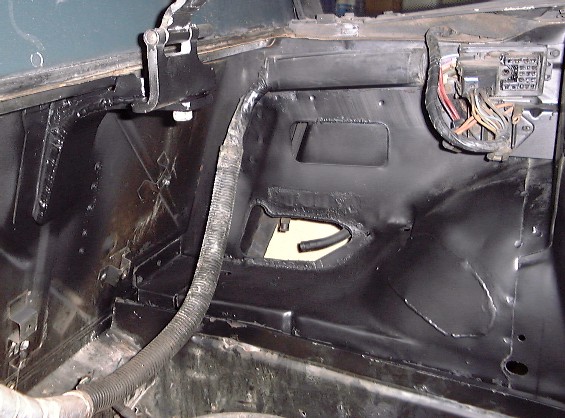
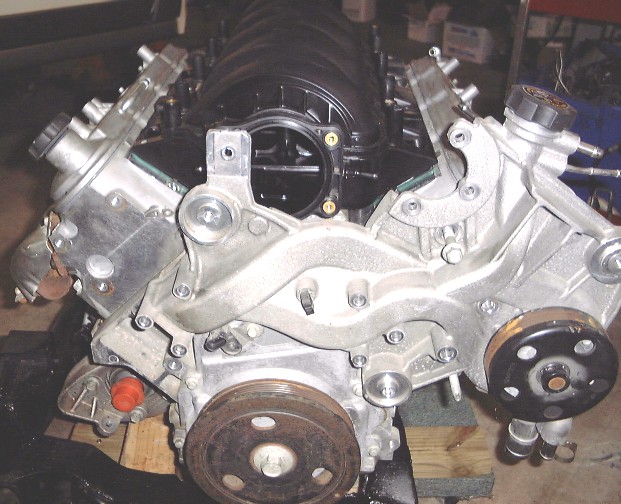
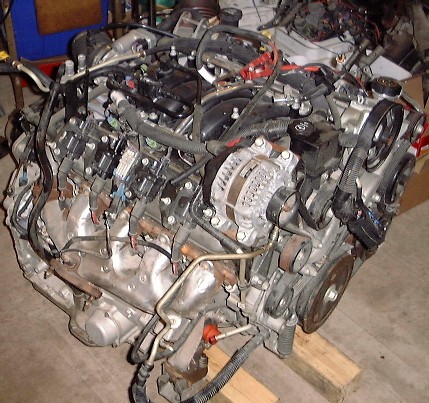
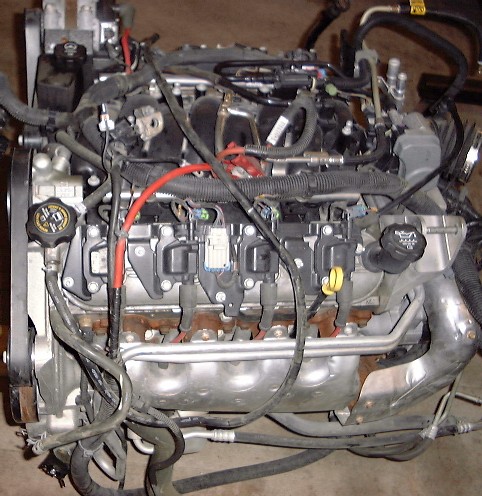
A couple of things I have noticed about this engine is it shares a lot of the standard architecture with the LS1 series of engines, except for the bellhousing bolt pattern, starter mounting location, shorter crank, and more compact assy/belt drive setup. The transmission is actually going to create some issues because GM didn't cast in extra support in the area of the left rear mount -- probably because it wasn't used in the Grand Prix. I already have an idea of how to work around this issue so I can use my 4-corner mount system that doesn't require a dog-bone. Stock this powertrain only used 3 lower mounts (two on the pass side and one on the driver's side), which would require the use of a dog bone on the driver's side -- where no such provisions exist on the Fiero chassis. One of the goals I have for this swap is to modify the Fiero chassis as little as possible (if at all).

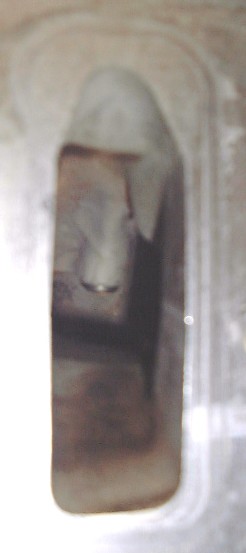
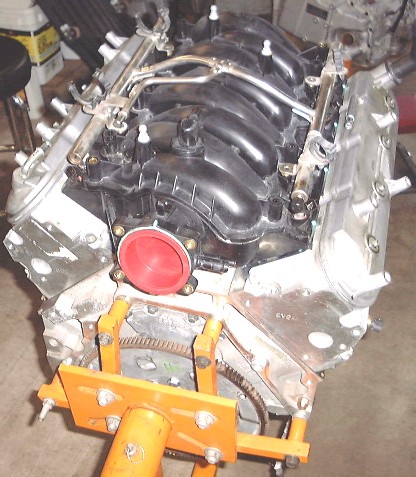
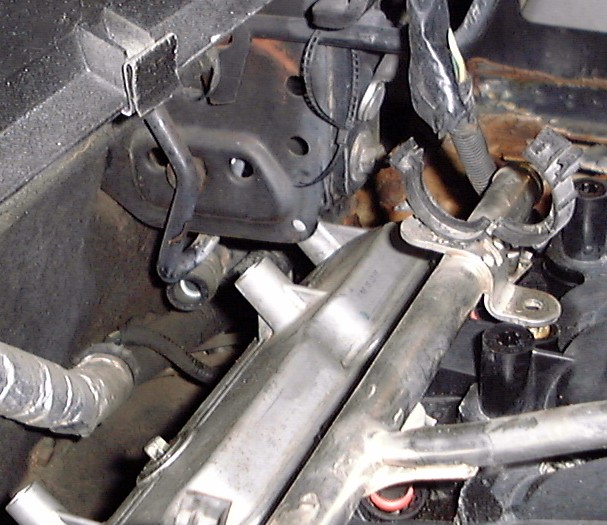
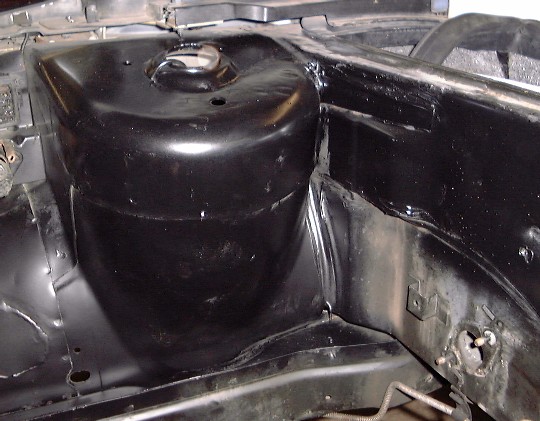
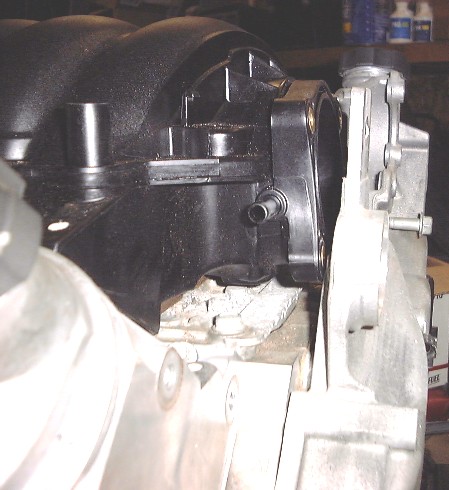
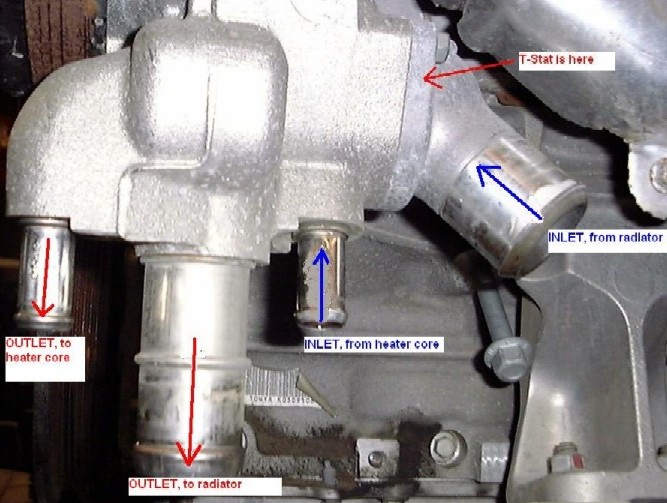
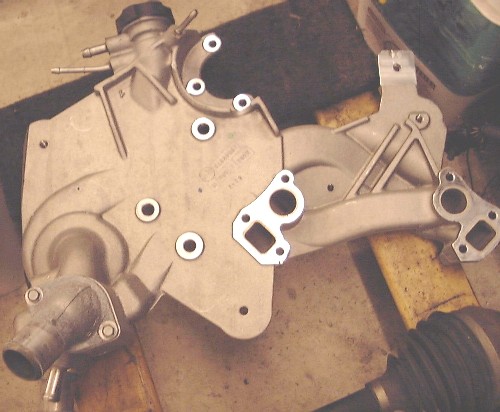
The front cover / water pump housing used on this engine is quite ingenious. All coolant connections are located in this cover as well as the fill point for the entire cooling system (the grand prix's radiator did not have a fill point on it). Below is a picture of the T-stat housing and all heater hose and radiator hose connections, which are located just behind and below the water pump.

Image

Image

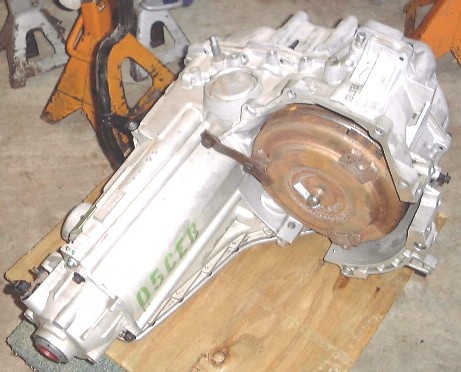
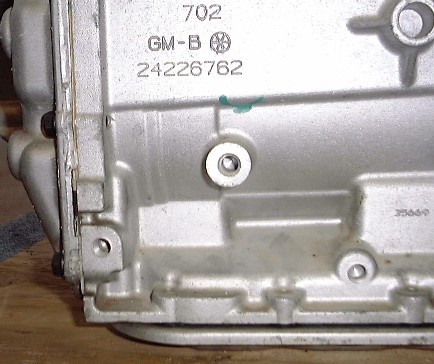
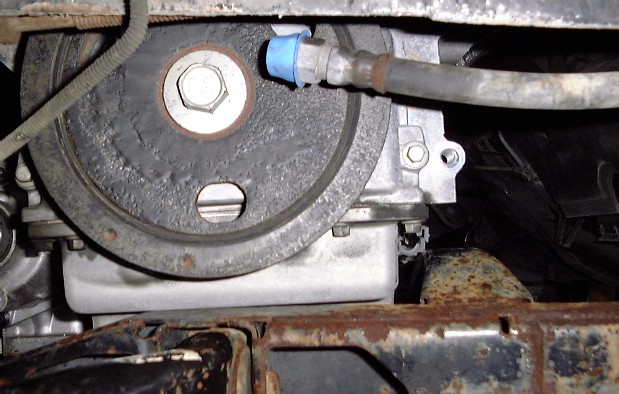
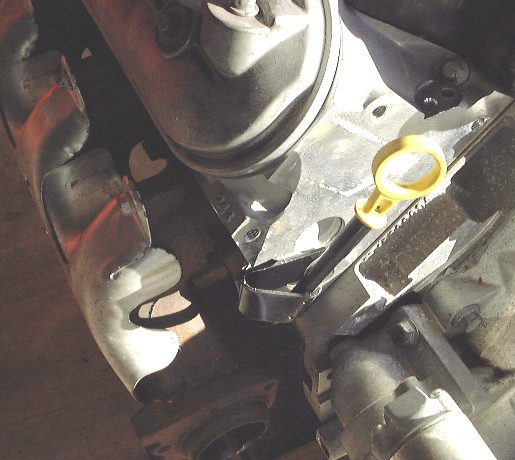
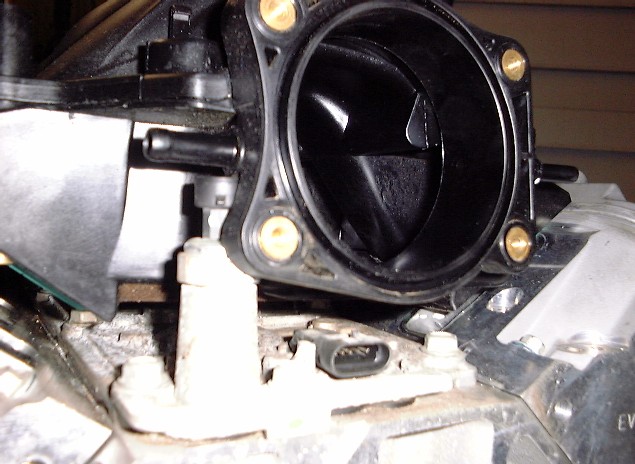
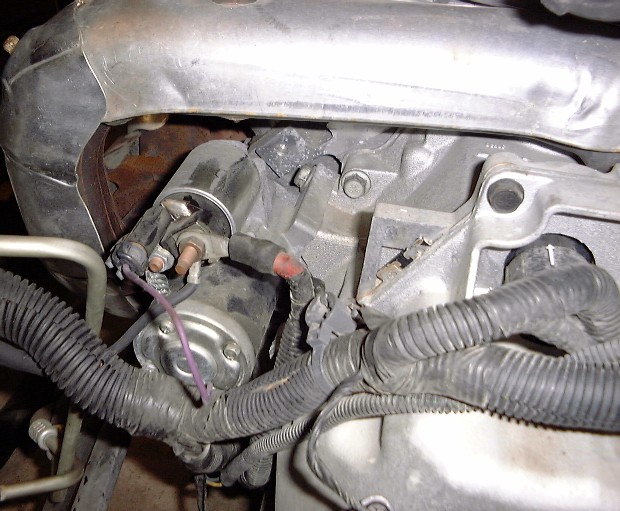
On this engine the starter is mounted to the transmission which is unique. The transmission case has a special casting to accomodate this.

Image

More pictures to follow. Other pictures and information on the LS4/4T65-E can be found on a page I dedicated to this powertrain on my website here:

http://www.gmtuners.com/LS4/index.htm

-ryan
Last edited by Sinister Fiero on Wed Nov 21, 2007 9:42 pm, edited 1 time in total.
OVERKILL IS UNDERRATED
Image
Custom GM OBD1 & OBD2 Tuning | Engine Conversions | www.gmtuners.com
Sinister Fiero
Posts: 665
Joined: Tue Jun 07, 2005 12:10 pm
Location: Waterloo, Indiana
Contact:

Post by Sinister Fiero »

Here are some pictures of the auto trans flexplate (flywheel) and back of the block...

Image

Image

This flexplate does NOT have a counterbalance weight; but it does have the FWD torque converter bolt pattern (for the larger, 258mm converter like the 3800 SC engines use).

Here are some pics of the transmission, off the engine...

Image

Image

And the left rear mount area I mentioned earlier where GM didn't cast in extra beef because no mounts were used in this location on this case, in the cars it was put into... A few of the holes are not even tapped or drilled all the way either.

Image

One of the things I was doing today was machining out some sleeves so they could accept the 84-87 Fiero engine cradle rubber mount bushings that I am using for my motor mounts.

Image

Since I had use of the neighbor's lathe all day I went ahead and knocked a few out. I also went ahead and made some aluminum inserts for mock-up when I weld everything together. The rubber cradle bushings have an interference fit to these sleeves so they have to be pressed in. And I can't weld on these sleeves with bushings in them; so that's where the aluminum inserts come in.

Image

-ryan
Sinister Fiero
Posts: 665
Joined: Tue Jun 07, 2005 12:10 pm
Location: Waterloo, Indiana
Contact:

Post by Sinister Fiero »

Here is a picture of the engine block when I had the heads off.

Image

I did the port work on the cylinder heads myself -- focusing especially in the area of the valve guide in both ports; which needed a lot of attention. I then took the heads to the machine shop to have a multi-angle, performance valve and seat grinding job done. Installed new valve seals and put everything back together (engine only had 40,000mi on it so there was no reason to change out valve springs).

Here are some pictures of the stock ports...

Image

Image

Image

Here is after the porting before the heads went to the machine shop...

Image

Image

Image

-ryan
Sinister Fiero
Posts: 665
Joined: Tue Jun 07, 2005 12:10 pm
Location: Waterloo, Indiana
Contact:

Post by Sinister Fiero »

The factory head gaskets are 3 layers (aka: multi layer steel, or MLS) and are coated with a black sealing agent in key areas. Obviously new factory gaskets were used, and the head bolts that are used on this engine are torque to yeild, so those had to be replaced as well. The LS4 uses ten - 11mm x 2.0 thread pitch bolts around the cylinders and five - 8mm x 1.25 bolts along the lifter valley per head. The 11mm bolts get torqed to 22 ft/lbs in sequence, then 90 deg turn each in sequence, then an additional 70 degrees in sequence for the final pass. Then the 8mm bolts get torqued to 22 ft/lbs from the center out.

Pics of the engine reassembled...

Image

Image

Image
Sinister Fiero
Posts: 665
Joined: Tue Jun 07, 2005 12:10 pm
Location: Waterloo, Indiana
Contact:

Post by Sinister Fiero »

Comin' out...

Image

After some work...

Image

Image

Now I have some cleanup to do in the eng compartment and with this cradle. After the initial cleaning is done I will start on test-fitting the LS4/4T65-E powerplant into the engine bay. Stay tuned...

-ryan
Sinister Fiero
Posts: 665
Joined: Tue Jun 07, 2005 12:10 pm
Location: Waterloo, Indiana
Contact:

Post by Sinister Fiero »

Test Fit #1...

Image

Image

Image

Image

Image

Image

Image
User avatar
Aaron
I just wanna ride my motorcycle
Posts: 5958
Joined: Sun May 29, 2005 5:15 am
Contact:

Post by Aaron »

Damn LSX fits better than my 3.4 DOHC. Holy crap.

Nice job, that should be one hullava Fiero.
88GT 3.4 DOHC Turbo
Gooch wrote:Way to go douche. You are like a one-man, fiero-destroying machine.
Sinister Fiero
Posts: 665
Joined: Tue Jun 07, 2005 12:10 pm
Location: Waterloo, Indiana
Contact:

Post by Sinister Fiero »

The oil dipstick tube was long enough that I was able to rebend it so it could be repositioned to be fastened to the back of the cylinder head -- thus giving easier access to it once installed in the Fiero...

Image

The oil filter was hitting the cradle so that had to be delt with...

Image

Not pictured is the plate I welded across the bottom of the cradle in this area in order to box it in and reinforce it. I was concerned about not doing this because I felt without the boxing the cradle would have been weak in this area.

As seen in one of the pictures above in one of my previous posts, during the test fit the oil pan was resting on the cradle -- so that had to be corrected...

Image

In doing this, it created a problem where the control arm would have hit the now boxed area if the suspension would have bottomed out so I did have to modify the control arm in the area of the bushing slightly (not pictured); but it wasn't a big deal.

The only other area that required notching was on the left side where the transmission side cover had a boss on it that would have contacted the cradle. So I corrected it by notching this area out of the cradle and then filled in the hole by welding in some metal...

Image

No control arm modifications were required on this side after this was done because it wasn't that big of a cut-out. Also notice in the above pic where some of the area where the mount bolts to the cradle had to be ground away to clear the corner of the transmission pan. Not pictured are about 3 other areas that required slight massaging to clear the engine/transmission. Not a big deal, but again it had to be done. Since the 88 cradles have less room, I assume more work will be required to get this powerplant to fit in one of those cars but that was expected.

-ryan
blkcofy
Posts: 20
Joined: Tue Jun 27, 2006 12:46 am

Post by blkcofy »

Thought I would share the work I did on the interior before handing off to Sinister for the LS4 Swap. Leather seat kit from Mr. Mike's. I had Mike stitch the logo design from a gentleman who redesigned the horse logo and got eveyone all excited about new badges...still haven't received mine yet! But it looks nice on the seats. Then I color matched the Lambo Creme color and Pistol Grip Black from Mr. Mike w/ Sherwin Williams Automotive Interior paint and sprayed all the panels using a low volume pressure spray gun. New carpet, new black seat belts, new headliner and sunroof trim, and short shifter from Rodney's (though that all goes away with the paddle shift kit).

Here's what the interior looked like before painting...
Image Image

And now after the interior work. It turned out way better than I expected. I'm happy with it. I told my wife all of the episodes of Unique Whips and Overhauling would pay off! I still have to paint the instrument panel housing, but will do that after I the swap...
Image Image

Image Image

New air vent corner panels were also painted, and I painted the ash tray door covers and even the carpet on the glove compartment pocket. Turned out nice too. The steering wheel is a MOMO steering wheel I picked up off ebay. I was able to mount it to keep the OEM Fiero horn. One day I'll figure out how to wire the horn to get rid of that darn metal pin, as it's not working well right now. I tried to dremmel down a long screw to match the metal pin...works well until I make a hard right, and the horn engages! I'll figure something out.

I still have to order the Mr. Mike lower door panels (black to match seats) and visors (lambo creme to match seats) to finish the interior. I also recovered the fire wall in black vinyl.

I also broke the bank and invested in some "extras" just to keep Sinister busy!! I think Peter Parker's Uncle Ben said it best..."With great power, comes great responsibility...and better aftermarket parts!".

Image
Intrax Front and Rear Sway Bars to keep this thing on the road!

Image
Koni Shocks and Struts from The Fiero Store

Image
400lb springs and coilovers from West Coast Fiero

Image
Complete Poly kit on pretty much everything but the engine mounts from The Fiero Store

Image
Some very hot looking C6 Corvette exhaust tips. There's not going to be enough room for a muffler, but Ryan is trying to create split cats off the headers to split exhaust. Hope it's not TOO loud!! :)

Image Image
A very VERY cool Steering Wheel Sport Paddle Shifter kit from Twist Machine. As Ryan mentioned, I'm going with the 4Te65 tranny and keeping the TAPshift functionality. (Yes...giving up my 5sp Getrag!) But this kit will allow me to mimic the paddle shifts on my MOMO steering wheel like the original donor car.

Image
This was 'Junior' as I left him in the great hands, care, and expertise of Ryan. I didn't realize how much I'd miss this car until it was gone!

I'm still on a quest for an affordable, yet effective bigger rotor brake upgrade. I think I'm ALMOST sold on the RCC Specialty kit and will look to find my own rotors and calipers. I'm sooo impressed with the folks there. They've bent over backwards to help me. And since I'm going with at least 11" rotors, I have to find an affordable, yet unique tire/wheel package. After seeing all the awesome setups on many of the RFT owners, I'm looking for a 17x8 225/45 on the fronts and 18x9 265/35 on the rears. From what I've read, I need to stay w/in a 35 to 40 offset range. I'm still investigating a less than expensive break option than RCC's $1260...and their not even the most expensive!!

Painting and body work won't happen til next year, while I work my azz off to re-stock my depleting bank account! But I'm going with a gun metal metalic gray w/ black racing stripes. Have you seen this look on the porsche? Fricken killer look...in my opinion.

Image

I've been dreaming about doing this for at LEAST 8 years. I am just so dang stoked about it finally coming to life, you have no idea. I haven't figured out if my wife is happy for me or just laughing at my childish giggles everytime I check on Ryan's progress. A key to that of course is keeping the reciepts far, far, away from her! A boy and his toys...
Sinister Fiero
Posts: 665
Joined: Tue Jun 07, 2005 12:10 pm
Location: Waterloo, Indiana
Contact:

Post by Sinister Fiero »

Just a little update: did the 2nd test fit yesterday with the water pump housing installed; which revealed that I will have to modify the water pump housing in the upper portions (top front idler pulley, coolant fill cap locations) so it will work in the Fiero engine compartment. The front upper idler pulley will hit the firewall when installed and the coolant fill cap will interfere with the deck lid hinge. I don't have any pictures of what I am going to do to modify this housing yet, but I will post some when the modifications are done so you can see what I had to do.

I borrowed a spot weld drilling tool kit and removed the dog bone mount bracket and battery tray from the chassis. I also clearanced the hinge support and will be working on a plate to weld in there to support the modified deck lid hinge. I am also working on motor and trans mount brackets. As soon as I get these completed, I will post some pics.

-ryan
Honest Don
Posts: 469
Joined: Wed Aug 08, 2007 11:08 am

Post by Honest Don »

I have a stock LS1 cam out of a 2000 Firebird you can have for the cost of shipping and a 12pack. It should be more lift and duration vs. what's in the LS4 but not enough to throw off the factory tune.

The only thing that *might* be an issue w/running it is that I think I remember something about a reluctor wheel on the cams of the later LS-series engines. I could be wrong though.
Sinister Fiero
Posts: 665
Joined: Tue Jun 07, 2005 12:10 pm
Location: Waterloo, Indiana
Contact:

Post by Sinister Fiero »

Honest Don wrote:I have a stock LS1 cam out of a 2000 Firebird you can have for the cost of shipping and a 12pack. It should be more lift and duration vs. what's in the LS4 but not enough to throw off the factory tune.

The only thing that *might* be an issue w/running it is that I think I remember something about a reluctor wheel on the cams of the later LS-series engines. I could be wrong though.
I have been told the early LS1 cams have a different bolt-to-cam sprocket design than what the LS4 uses. I have also been told the LS4's cam is "special" so it will work with the DoD lifters.
Sinister Fiero
Posts: 665
Joined: Tue Jun 07, 2005 12:10 pm
Location: Waterloo, Indiana
Contact:

Post by Sinister Fiero »

Here are some update pics of the modifications needed to the right side of the engine compartment. This particular car looks to of had a battery leak at one point which caused some damage in and around the area of the battery tray. As you can see in one of the pictures a plate had to be welded over a bad area that had rusted thru in a few places. Also pictured is the modified hinge support bracket.

Image

Image
Sinister Fiero
Posts: 665
Joined: Tue Jun 07, 2005 12:10 pm
Location: Waterloo, Indiana
Contact:

Post by Sinister Fiero »

Well I've completed about 2.5 mounts and hope to finish the rest tomorrow. Will get pics after everything is put together and painted. I have just been told that the getrag from this car has been sold so I have to get that crated up and shipped out. I also have to get the control arms disassembled and shipped off to the owner (blkcofy) so he can powdercoat them and get them back to me before I need them.

So please excuse the lack of updates but all this work doesn't leave much time to update the build thread.

-ryan
Honest Don
Posts: 469
Joined: Wed Aug 08, 2007 11:08 am

Post by Honest Don »

Sinister Fiero wrote:
Honest Don wrote:I have a stock LS1 cam out of a 2000 Firebird you can have for the cost of shipping and a 12pack. It should be more lift and duration vs. what's in the LS4 but not enough to throw off the factory tune.

The only thing that *might* be an issue w/running it is that I think I remember something about a reluctor wheel on the cams of the later LS-series engines. I could be wrong though.
I have been told the early LS1 cams have a different bolt-to-cam sprocket design than what the LS4 uses. I have also been told the LS4's cam is "special" so it will work with the DoD lifters.

Interesting. Oh well, good luck with it. looking good so far
Sinister Fiero
Posts: 665
Joined: Tue Jun 07, 2005 12:10 pm
Location: Waterloo, Indiana
Contact:

Post by Sinister Fiero »

Sorry for the delay but I had to install a new shop heater this week since the weather has started to go downhill. But I was able to borrow an LS2 intake from Lingenfelter and here is what I found...

Image

The LS2 intake's throttle body inlet is molded too low and won't clear the oil pressure sending unit; but even if that were removed and the boss for it machined down, measurements indicate the intake will still not clear the DoD electrical plug.

So I turned the LS2 intake around to see if it would fit the other way and yes it will -- at least bolt right down on the heads and clear the oil pressure sender and DoD plug... BUT...

Image

Image

Once the water pump housing is installed it won't clear a critical part of the housing -- one of the coolant passages. Here is a comparison picture between the LS2 and LS4 intake...

Image

As you can see the LS2 intake has a much larger throttle body opening than the LS4. However, it's unclear at this time if the LS4 needs this large of a throttle body. I'm sure the LS4 would benefit from a larger throttle body and throttle body opening but exactly what size is optimal is still unknown. Also, the factory LS4 throttle body and fuel rails will not work with the LS2 intake.

Based on the test fits I have performed, I have determined that it might be possible to modify an AFTERMARKET cast-aluminum LSx intake to work on this engine and still have the throttle body facing the correct way. But prices for such intakes range from $500 and up, plus the factory LS4's fuel rails or throttle body may not be compatible. So extra costs will be associated with the upgrade.

That aside, I was able to finish the engine and transmission mounts so I will get pictures of those as soon as the paint dries. I am working on modifying the water pump housing as well as building my alternator relocation brackets and will get pictures posted of those when I am done.

-ryan
The Dark Side of Will
Peer Mediator
Posts: 15751
Joined: Wed Nov 24, 2004 11:13 pm
Location: In the darkness, where fear and knowing are one
Contact:

Post by The Dark Side of Will »

Sinister Fiero wrote:Also, the factory LS4 throttle body and fuel rails will not work with the LS2 intake.

Based on the test fits I have performed, I have determined that it might be possible to modify an AFTERMARKET cast-aluminum LSx intake to work on this engine and still have the throttle body facing the correct way. But prices for such intakes range from $500 and up, plus the factory LS4's fuel rails or throttle body may not be compatible. So extra costs will be associated with the upgrade.
It seems strange to me that GM would have so many versions of the interfaces for components that should be pretty much standardized across whatever application the engine ends up in.

Have you looked in to a FAST LSX plastic intake? Going to an aluminum intake, even one with fuel injection, seems like a step backwards to me.
S8n
Posts: 684
Joined: Fri Sep 09, 2005 11:17 pm
Location: O-Town

Post by S8n »

You can grind down and retap that boss by quite a bit. Or, do you have room for a different LSX water pump? And depending on if you want to keep DoD, you can swap out valley pans.
-Chuck
chukjagr@hotmail.com
'87 GT *Now can be seen at V8Archie's!* www.fotki.com/8balls
blkcofy
Posts: 20
Joined: Tue Jun 27, 2006 12:46 am

Post by blkcofy »

SUSPENSION AND 12" CORVETTE BRAKE UPDATE

Shiny red Koni Shocks and Struts...check! Shiny blue Performance Springs and Coil Overs from WCF...check! But I'm still trying to find a company that can make good on the purple Intrax Front and Rear Sway Bars. I've bought them twice, only to be told they are on so long on back order, that both companies gave me my money back! Has ANYONE been successful at getting these bars? I'm still holding out for Intrax, but will start looking for other options very soon. The front bar won't be a problem, but I need to get a rear bar to Darth soon, so he can make sure it fits with the LS4.

Speaking of the LS4, I was very interested in the LS2 Intake option, as logic should support bigger gains from a bigger inlet, but I read in an Hot Rod article going with the LS2 intake was not necessarily a guarrentee for gains. The author thought there were other issues with the overall 2 piece design that minimized any gains from the larger intake. So with all of the porting Sinister has done on this engine, I'm feeling quite content with staying with the OEM LS4 intake, small intake and all! It would have been nice to have a bigger intake, but I'm good! :)

Back to the 12" Corvette Brake update. Sinister received all the parts needed for the upgrade from Fiero Addiction. Hopefully Sinister can send me a quick picture so I can see how the slotted cross drilled rotors look. I received my 1988 Front Calipers from calipersonline.com and painted the front half of them with red caliper paint. Not as nice as powder coating, but I didn't feel really bullish about taking these calipers apart. The below picture looks really "bloody", as they actually look good for paint, but not as good as powder coating. Maybe in the future...

Image Image

I'm still waiting to get my 1988 Rear Calipers from calipersonline.com, and maybe I'll try powder coating these. That is one skill I can at least claim competency on! I had Darth take my main suspension parts off my car and send them to me. Didn't look too bad, in terms of rust as the car had been given a Ziebart undercoating back in 1988. This first picture is the underside of my front suspension. Can't wait to get these OEM shocks, springs, and 9" rotors replaced!!
Image

This second shot are my rear upper control arms. Not too much rust, if at all, but definitely could use a good cleaning and powder coating.
Image

I joined a private garage last year in Fairfield, Ohio called Painters Lane (http://www.painterslane.com/) which is basically a DIY
center that supplies all the equipment and "coaching" one needs to do restoration and repair to your car. I learned how to powder coat, and decided to apply this new skill to my suspension parts. The biggest task is getting these pieces sand blasted down to the metal. The paint and rust comes off pretty easy, but the undercoating and 20 years of caked on grease was a pain, but I think the results were well worth it!
Image Image

Image Image

Image Image

Image

So I've still got to do the Front Lower Control Arms and the Rear Knuckles, which are going to be a big task in getting all the rust and Ziebart undercoating off, but once done, should look pretty nice up against the red polyurethane bushings, red shocks, and blue springs. The coating I used is a Black with Silver Vein with a coat of gloss. I kept the coating out of the bearing areas as much as possible. I've also still have to do the Front Spindles, which I'm likely to find some bolts to screw into the threads to keep the powder coat out. There's also some heat tempature tape I'll use to keep the powder out of the areas it shouldn't be allowed to go.

Image

Once all of this is done, I'm shipping it back to Darth so he can have them for assembly. It always amazes me how much shops charge to powder coat, as it's a pretty easy process if you have the right equipment...then I remember how tough it is to get the parts down to the metal and then it makes sense. But if you can do it yourself, it saves a bundle. I may just get the Fiero Store sway bars and powder coat them myself as well.

Hope you guys don't mind all the pictures. It really helps to have mini-projects to do on the car while Sinister has the main project going to "keep busy" while my baby is gone! I can't wait to see this project finished. Next step is finding some dang wheels to fit this car! Someone said this part was more of an "art" then hard fast guidelines. They are soooo right. The 12" Corvette Rotors will NOT fit my 15" OEM Wheels, unless Sinister does a bit of creative cutting and grinding, so I have to at least go 16". Of course I'll be going bigger than that. My goal is 17x7 w/ 225/45 on the front and 18x8 w/ 255/35 in the rear. Like I said...not an easy task! The trick is getting the right offset, which is difficult to do without having the car to test fit!
p8ntman442
cant get enough of this site!
Posts: 3289
Joined: Wed Mar 30, 2005 2:37 pm

Post by p8ntman442 »

You can powdercoat brake calipers. The rubber seals withstand lots of heat when hard brakeing. I used to powdercoat, and my brother did a set and I felt the same way as you do now, but he proved me wrong. He left them completely assembled, minus the bleeder screws (so as to prevent pressure build up) and baked them at 450 for an hour or so.
Post Reply